
This article introduces the React Multiple Select using React Hooks.
I have vendors in various cities who are providing service to their customers. The situation is I need to assign societies to vendors as per their preference. A vendor may provide service to multiple societies in an area.
For this, I used Metronic theme and React hooks – useEffect.
There is a list of vendors and now I want to assign societies to a particular vendor.
To do so I redirected to details of the vendor.
First, select a city, then an area and then I want a filtered list of societies from that area of the city.
![]()
Step 1 :
Fetched a list of cities using async-await with useEffect hook.
/* Get list of all Cities */
const apiUrl = API_ENDPOINT + “city_list/”;
useEffect(() => {
const fetchData = async () => {
const result = await axios(apiUrl).then(response => response.data)
.then((data) => {
setData(data.data);
let count = Object.keys(data.data).length;
setcount(count);
})
};
fetchData();
}, []);
/* End Get list of all Cities */
Step 2 :
Fetched a list of areas from the selected city using async-await with useEffect as —>
/* Get area list by City */
const apiUrlArea = API_ENDPOINT + “area_list/”;
useEffect(() => {
let postAreaData=”;
if(formdata.city_id && formdata.city_id !==”){
postAreaData = {city_id:formdata.city_id}
const fetchData = async () => {
const result = await axios.post(apiUrlArea,postAreaData).then(response => response.data)
.then((data) => {
setareadata(data.data);
})
};
fetchData();
}
},[formdata.city_id]);
/* End Get area list by City */
Here formdata contains details of the vendor to edit.
This code will get executed as we change City and we are able to get a list of all areas from the selected city.
Step 3 :
Now I have a city and area , I can get a list of all societies in that area.
/* Get Societies by City & Area */
const apiUrlGetSociety = API_ENDPOINT + “society_list”;
useEffect(() => {
let postCityAreaData = {
area_id:formdata.area_id,
city_id:formdata.city_id,
}
const temp_slist = [];
if(formdata.area_id && formdata.area_id!== ” && formdata.city_id && formdata.city_id!== ” ){
const fetchData = async () => {
const result = await axios.post(apiUrlGetSociety,postCityAreaData).then(response => response.data)
.then((data) => {
data.data.forEach(element => {
const obj_temp = {‘id’:element.id, ‘name’:element.name};
temp_slist.push(obj_temp);
});
setAllSocieties(temp_slist);
setShowLoading(false);
console.log(“allSocieties”);
console.log(temp_slist);
})
};
fetchData();
}
},[formdata.area_id,formdata.city_id]);
/* End Get Societies of Area */
Here I get a list of societies as an array of object – {id,name}
let allSocieties = [ {“id”: 6,”name”: “Abhiruchi”}, {“id”: 2,”name”: “Sahara Society”}, {“id”: 3,”name”: “Satyam Society”},]
Now we have a filtered list of societies with respect to the area from the city.
Step 4 :
To show listing on form I used form-components from Metronics.
The Select component can handle multiple selections. It’s enabled with multiple property.
<FormControl className='form-control'>
<Select
multiple
name = “societies”
id = “societies”
value = { selectedSocieties }
onChange = { handleChange_multiple }
input = { <Input id=”select-multiple-chip” /> }
renderValue = { selected => (
<div className = {classes.chips}>
{ selected.map( s => {
const chipname = allSocieties.find(soc => soc.id === s);
return (chipname
? <Chip
key={s}
label={chipname.name}
className={classes.chip}
data-aaa={JSON.stringify(allSocieties)}
/>
: ”)
})}
</div>
)}
MenuProps={MenuProps}
>
{ allSocieties.map((itemsociety) => (
<MenuItem
key={itemsociety.id}
value={itemsociety}
>
<Checkbox checked={selectedSocieties.includes(itemsociety.id) } />
<ListItemText primary={itemsociety.name} />
</MenuItem>
))}
</Select>
</FormControl>
In the above select component, we have passed selectedSocieties to value attribute.
selectedSocieties is an array of ids of societies which are already assigned to vendor.
I can get list of assigned societies to vendor as –>
useEffect(() => {
setShowLoading(true)
setformdata(props.data)
if(props.data.vendorSociety && props.data.vendorSociety !== ” && props.data.vendorSociety !== ‘undefined’ ){
props.data.vendorSociety.forEach(el => {
const obj = {‘id’:el.id, ‘name’:el.name};
temp_selected_slist.push(el.id);
})
setSelectedSocieties(temp_selected_slist);
}
}, [props.data]);

After selecting one/more societies, handleChange_multiple event bind selected societies data to selectedSocieties . See the following code:
const handleChange_multiple = event =>{
let newitems = event.target.value.filter(t => typeof t !== ‘number’);
let changed = newitems[0].id;
let cleanthis = event.target.value.filter(t => typeof t === ‘number’);
newitems.forEach(i => cleanthis.push(i.id));
const newSelectedItems = selectedSocieties.includes(changed)
? selectedSocieties.filter(v => v !== changed)
: […selectedSocieties, changed];
setSelectedSocieties(newSelectedItems);
}
In the example given in Metronic , handleChange event deals with an array of the name only. In above we are dealing with an array of objects.
In the above code, in handleChange_multiple event, we get newly selected items as an object – newitems {id,name}. Then extract id from it and saved to changed.
Now I can check with changed whether it exist in selectedSocieties.
const newSelectedItems = selectedSocieties.includes(changed)
? selectedSocieties.filter(v => v !== changed)
: […selectedSocieties, changed];
setSelectedSocieties(newSelectedItems);
In above article , we learned how to use multiple select in combination with array of objects and obtain required results.

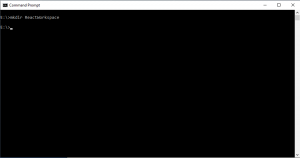 Step 3: Go to newly created ReactWorkspace directory location using command – see screenshot:
cd ReactWorkspace
Step 3: Go to newly created ReactWorkspace directory location using command – see screenshot:
cd ReactWorkspace
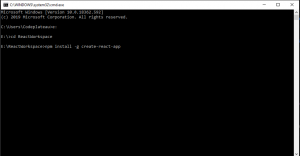
 Step 4: Setting up React Boilerplate.
We will install the boilerplate globally.
npm install –g create-react-app
Create a React Boilerplate using the above command – see screenshot.
Step 4: Setting up React Boilerplate.
We will install the boilerplate globally.
npm install –g create-react-app
Create a React Boilerplate using the above command – see screenshot.
 -g represents the global installation type.
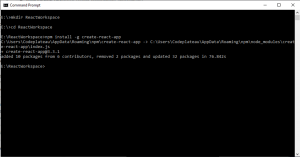
Step 5: After successfully installing a global react environment. Create react demo app using the following command:
create-react-app demoapp
The above statement will create a new directory named demoapp inside your current directory with a bunch of files needed to successfully run a React app.
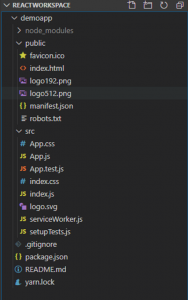
Let’s have the look at the directory created by the above command:
-g represents the global installation type.
Step 5: After successfully installing a global react environment. Create react demo app using the following command:
create-react-app demoapp
The above statement will create a new directory named demoapp inside your current directory with a bunch of files needed to successfully run a React app.
Let’s have the look at the directory created by the above command:
 In the following directory, you will see a number of files. The main files we will be working on within the basic course are index.html and index.js. The index.html file will have a div element with id = “root”, inside which everything will be rendered and all of our React code will be inside the index.js file.
 Now, that we have successfully set up the development environment for React Js.
The last thing is to start the development server.
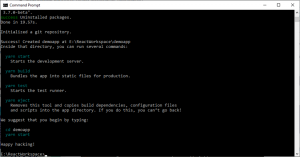
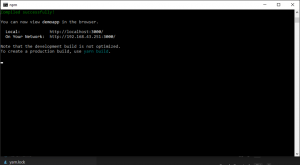
Step 6: To start the development server, go inside your current directory “demoapp” and execute the below command:
npm start
After successfully running the above command your compiler will show the below message on your screen:
Now, that we have successfully set up the development environment for React Js.
The last thing is to start the development server.
Step 6: To start the development server, go inside your current directory “demoapp” and execute the below command:
npm start
After successfully running the above command your compiler will show the below message on your screen:
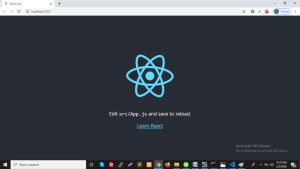
 And after starting our first React application, we will see the default screen on the browser.
 Component creation in React Js:
Components are the reusable peace of code for building blocks of any React application. It’s like JavaScript functions. They accept arbitrary inputs (called “props”) and return React elements describing what should display on the screen.
We have seen the default structure of the ReactJS application in step 5 second screenshot.
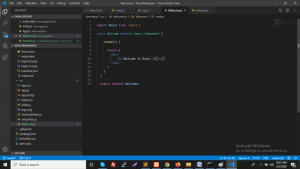
Create a new component file in /src folder-
I have created Welcome.js and add component code in that file-
Component creation in React Js:
Components are the reusable peace of code for building blocks of any React application. It’s like JavaScript functions. They accept arbitrary inputs (called “props”) and return React elements describing what should display on the screen.
We have seen the default structure of the ReactJS application in step 5 second screenshot.
Create a new component file in /src folder-
I have created Welcome.js and add component code in that file-
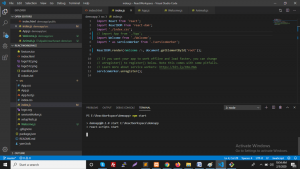
 And we need to add our newly created Welcome.js file into index.js to see it on the browser screen:
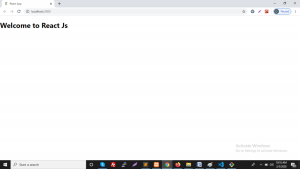
 Now we can see the output on browser screen:
 In the above article, we learned how to setup React JS Environment and create simple components.


